• Today I'm sharing the last of the cards from the Christmas Class. If you're looking for a simply elegant card idea these are for you!

    DSC_4252

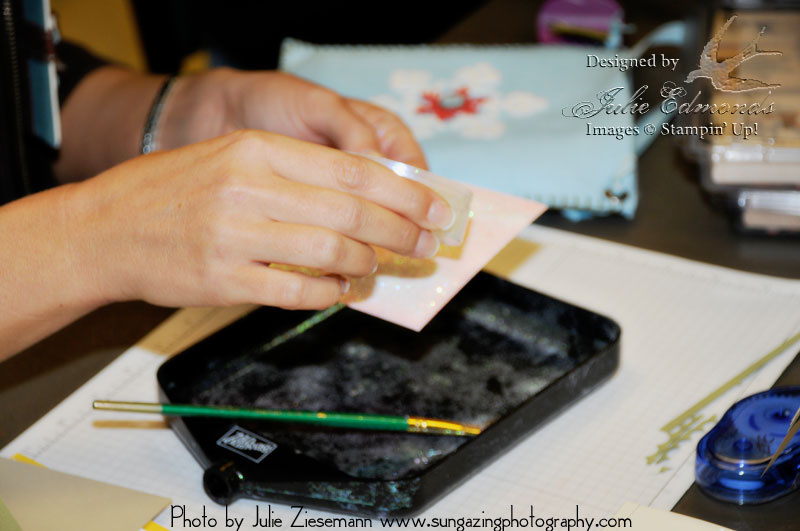
    The fifth card for the class needed a touch of Dazzling Diamonds glitter. I can't believe we made it through the whole class with only one glitter card. It was very easy glitter – just dot the 2-way glue pen randomly over the card stock to make little dots of snow – then sprinkle with glitter and shake off the excess.

    DSC_4221

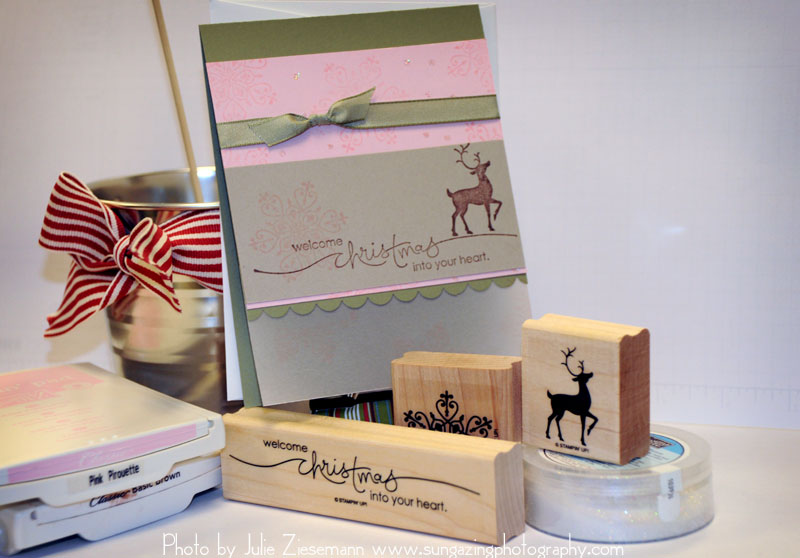
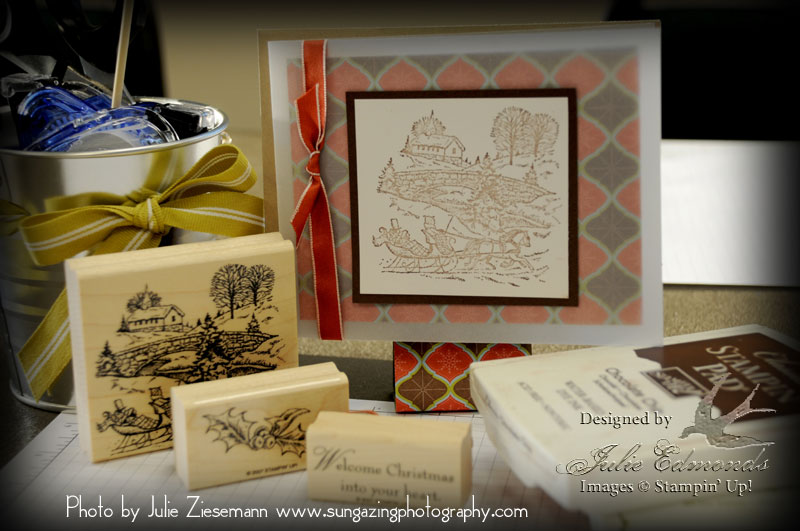
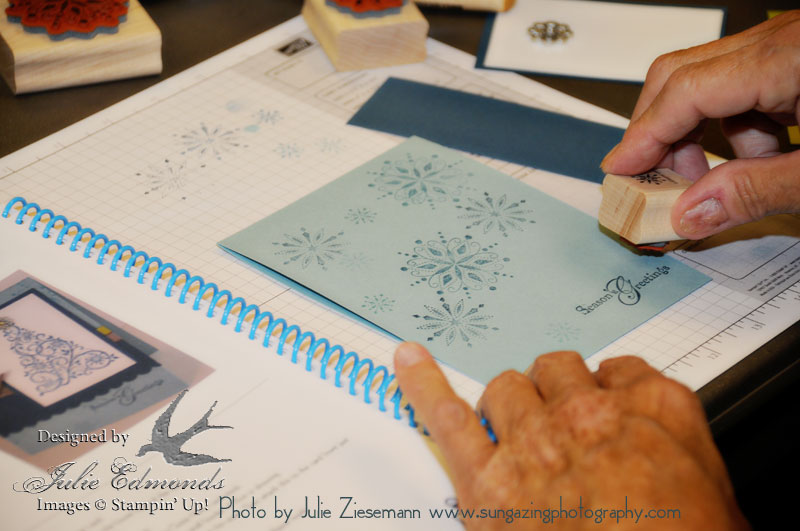
    This card featured the stamp sets, Heard From The Heart and Winter Post. There is a vellum edge at the bottom of the card stamped with pink snowflakes. We used the new scallop punch to add a fun detail to the bottom of the card as well. This card is actually one of the easiest cards from the class but it pack a big WOW!

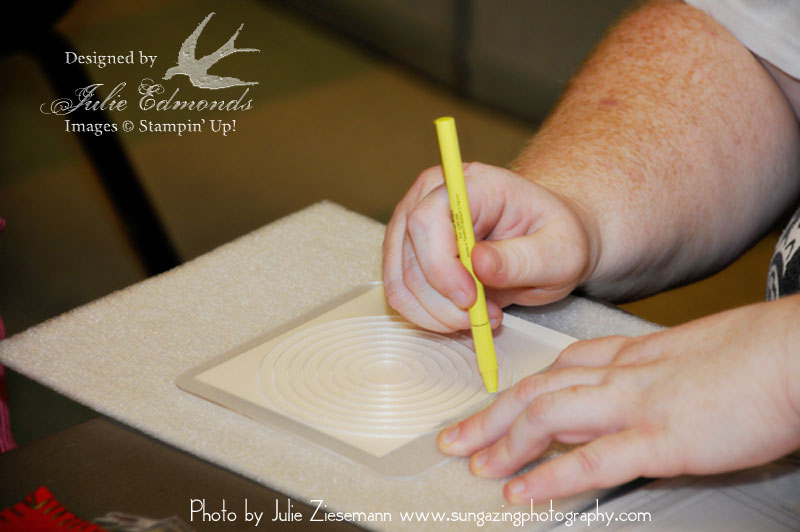
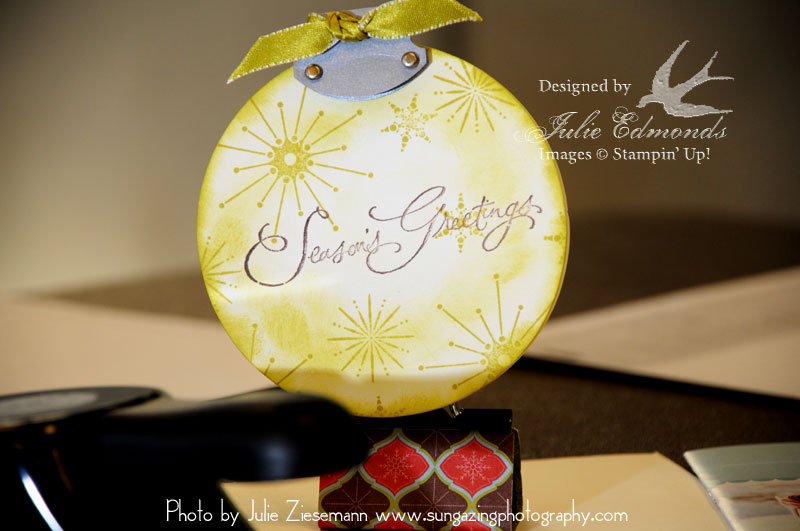
    And last but not least!! Another card from Lisa. This one features a little watercoloring technique. We try to keep the cards as simple as possible to make them easy to mass produce but this one was crying out for a watercolor look. With the help of my color expert Crista we came up with a technique that is pretty quick and easy. To help the students out at the class we created a sample board showing the steps for coloring the image…

    DSC_4275

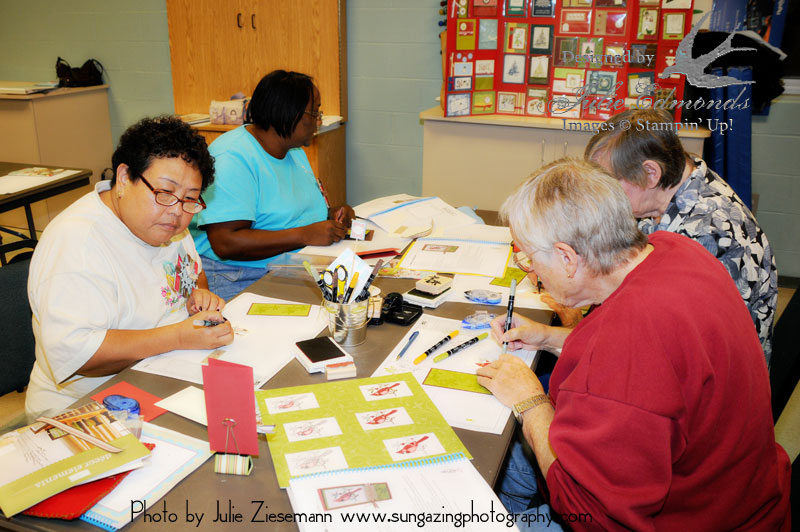
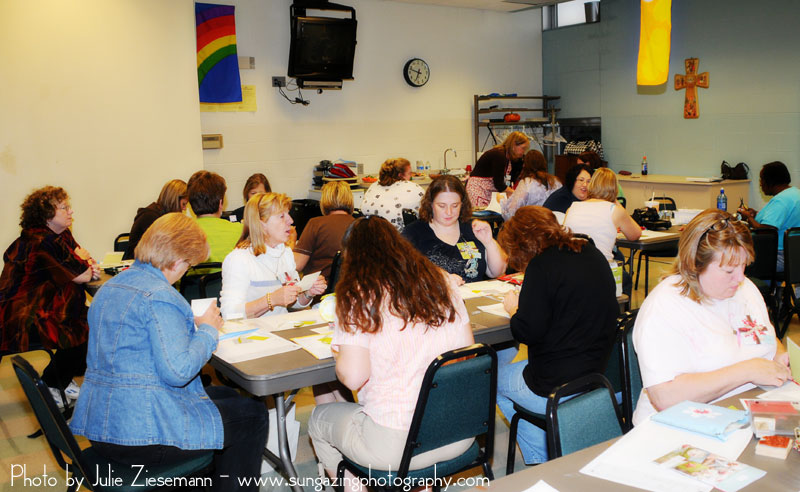
    The coloring map worked out very well and I'm sure I'll use it again in the future! Say hi to Jackie, Maggie, Priscilla, and Grandma (Cleo). All concentrating hard on their coloring.

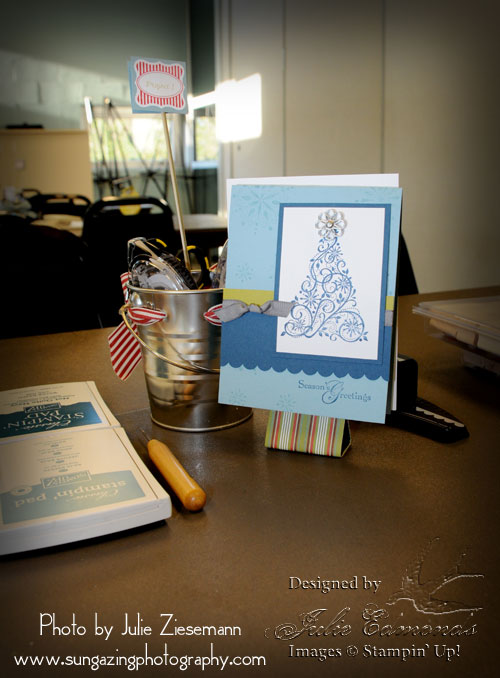
    I know you're anxious to see it… Here's the finished card.

    DSC_4188

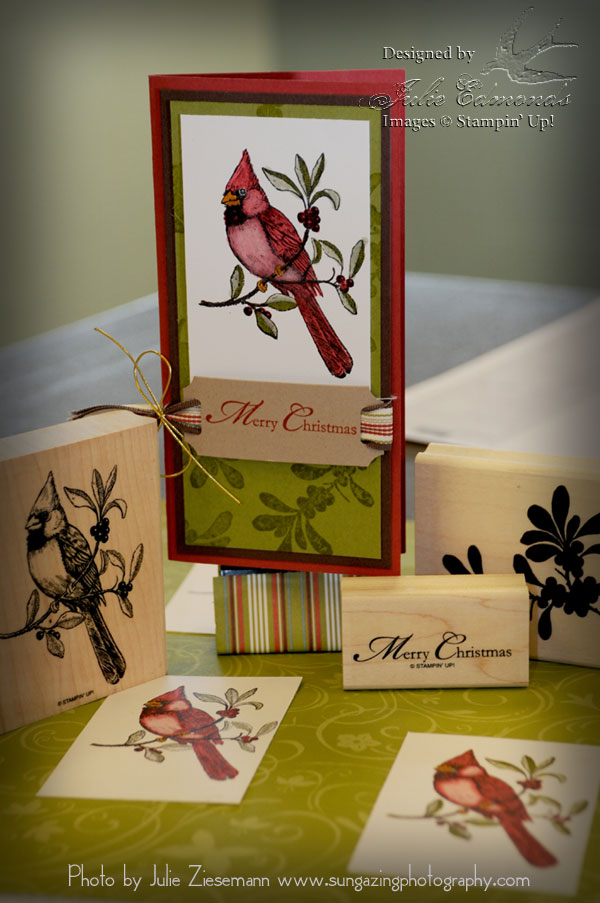
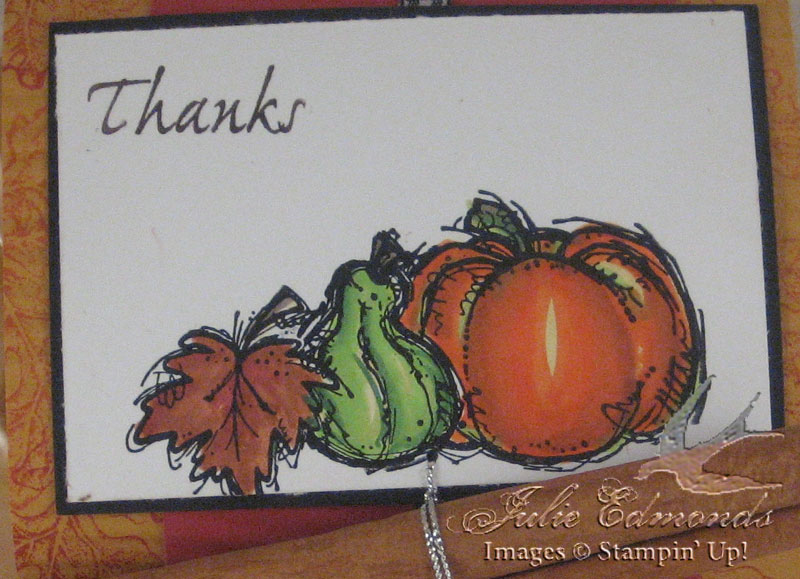
    A Cardinal Christmas stamp set is one of the best cardinal stamps I've seen. I LOVE it!

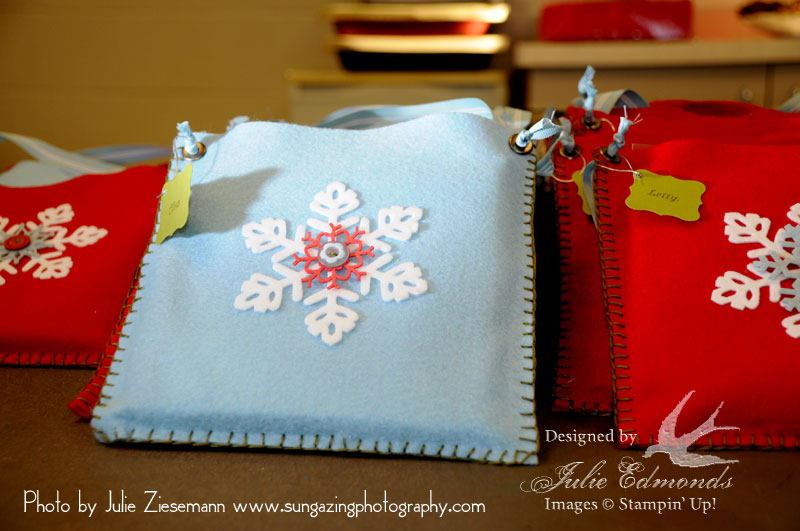
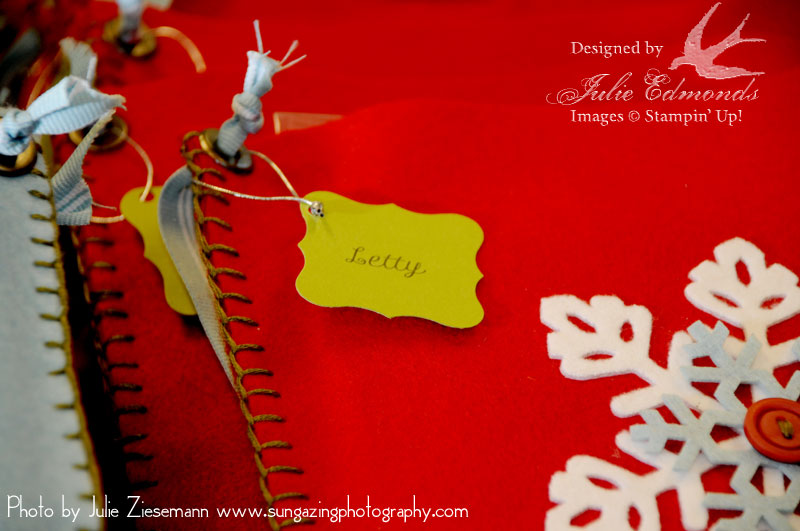
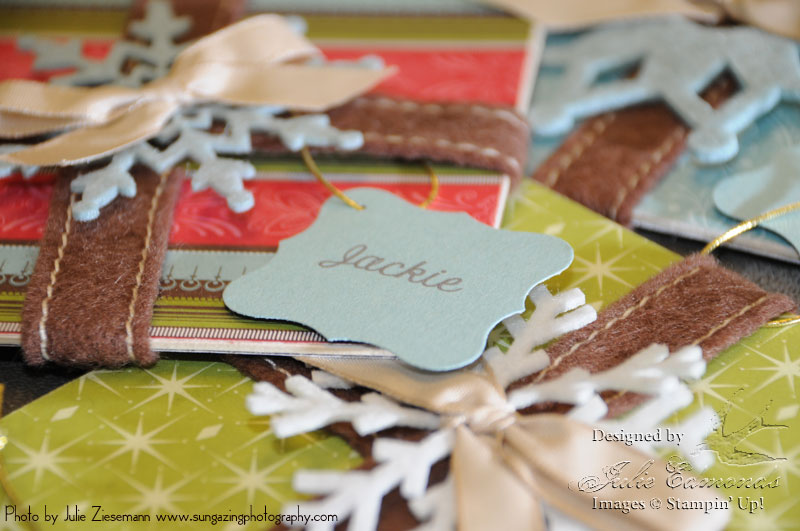
    If you could not make the Christmas Card class don't worry. My second favorite class of the season is coming up soon! The Annual Ornament Buffet will be held on Saturday December 13th – Just in time to crank out some ornaments as tie-ons for Christmas Gifts.

    Watch for more details on the Ornament Buffet coming in the November Newsletter - If you're not on my newsletter list sign up by typing your e-mail address in the newsletter box at the top of the page.

    Happy Stampin'
    Signature

  • I'm back and sharing two more of the cards from the Christmas Class!

    Thanks again to the bloggers who inspired our card ideas and another BIG thanks to Julie Z. for the pictures – You guys are going to get spoiled and expect fabulous pictures like this all the time!! 🙂 I'll try to do my best for you!!

    Card 3 at the class was a Vellum card.

    DSC_4194


    This is one of those cards that is even better in person – the Sleigh Bells scene from the stamp set Sleigh Bells Ring, was stamped on shimmer white card stock. The card is vellum card stock. With it's many layers of Designer Paper and card stock it's a very fun card! The greeting from the set was stamped inside the card along with the Holly Leaf and Berries. Finish it off with one of my favorite new ribbons – Riding Hood Red Taffeta and it's a WOW!

    The fourth card from the class was one of Lisa's cards. She had a lot of fun playing with colors on this card. It looked good in just about EVERY color – Silver or Gold – Real Red, Handsome Hunter, Almost Amethyst – You name it we tried it!! We choose the Elegant Eggplant and Silver combination for the class. (Our reason – well come on if you know me – I always pick purple if given the choice – Trust me you're lucky all the cards are not purple) 🙂

    DSC_4234

    The silver images on the card were embossed. This card features stamps from Christmas Classics and Heard From The Heart Stamp Sets.

    I just have two more cards from the class left to share. Hopefully I'll get them posted for tomorrow.

    If you need some help coming up with a Christmas Card idea for yourself this year I'm happy to help. Contact me and we'll set up a time to meet and plan your cards! Or just grab me for a few minutes at the next stamp camp and I'll help you out!

  • I'm taking a short break from the Christmas Card posts to give you a look at what I created for this month's team meeting swap. After all it is fall – one of my favorite seasons to stamp for! I love the leaves falling, the cold nip in the air, and of course the smells of Holiday baking! It truly is a season to be thankful for.

    Our theme for this month's meeting was – Give Thanks. My mom had spent the day baking some Leaf cut out cookies. She said she needed a practice batch before she started working on the Santas she makes for my Grandma to decorate each year. The cookies were so colorful lined up on the drying racks and they helped to inspire a swap idea. I though it would be fun to make up little boxes to put treats in for gift giving.

    IMG_9175_1

    This box was SO easy to make. No measuring, no scoring. Yep you heard me, no measuring! I have seen versions of this box in my blog travels and I was excited to try one out for myself. They are too much fun. So you're asking how did I make a box without measuring or scoring?? The answer is The Big Shot (I think I'm in love – The ideas never stop and the SU exclusive dies are FABULOUS) I used the Scallop Envelope die to cut out 4 envelopes. I also used the Premium Crease Pad while I was cutting to get fabulous deep crease marks – which made the folding VERY easy. Then you just attach the tabs of the envelopes together to create the box. Tuck the big flaps in to create the bottom of the box and fold the top flap over to decorate the sides of your box. I wrapped a strip of Designer Series Paper around my box to help give it strength.

    It was easy to swap also. I kept the boxes flat so they could get them home easily. For the picture I filled a cello bag with some of the cookies, tied it with a ribbon, and placed it in the box. Wouldn't these make great favors or place settings at your Thanksgiving Dinner?

    I was not the only one thinking food this month. Usually we swap cards at the meetings – but every once in a while someone gets inspired to swap a 3d idea. And this month Crista's idea was FABULOUS!

    IMG_9188_1

    Crista was able to get her hands on some empty Banana Split holders from DQ. She filled them with Muffins, wrapped some card stock around the container and decorated with some stamped images. To finish it off she tied on a cinnamon stick. It's another great gift idea that anyone would LOVE. And I know you're all trying to get a look at the top of the container to see the beautiful coloring job .. so here's a close up look…

    IMG_9190-1_1

    Crista has the coloring gift – I aspire to some day color like her! She swears it's easy … but I'm just not there yet. I'm always happy with what I do accomplish when I color – but I gobble up the tips Crista Shares! (And yes one Crista shows me the trick is usually is easier than I though it would be – she's a great teacher.)

    I hope you enjoyed the little break from Christmas .. I'll be back soon with more card pictures from the Christmas Card Class. And if you're as in LOVE with the Big Shot as I am and would like to see some more fun, creative ways to use your Big Shot – e-mail me today to schedule a workshop. I'll bring my big shot along with some fun projects for you and your friends to play with. Just let me know you want a Big Shot workshop!

    Happy Stampin'
    Signature

  • It's that time of year 🙂 We need a little Christmas every day to help motivate us to start our projects early!! I saved the best of the Christmas Card Class for last… The cards of course!! I'll post pictures of the cards everyone made at the class over the next couple of posts. A big Thank You to everyone out in the blog world who helped to inspire these card ideas – Some of them came right out of my head and lots of them came with some help from my fellow demonstrators!

    DSC_4268

    Before I share the card pictures I had to share this photo of the group all working on their cards. Does this look like fun or what?? Let me tell ya' WE HAD FUN!!

    The first card was a fun snowflake card using the Snow Swirled Set…

    DSC_4281


    A sneak peek of the card in progress and if you look close you can see the finished card in the instruction booklet to the left… But here's the card on display at Table #1

    DSC_4128 

    You can also see the buckets I used to mark each table. I used my Crop-A-Dile to punch holes in the top of the tin buckets, then threaded some ribbon through the holes. Scissors, Adhesive, and a Table Marker were placed inside each bucket.

    Card Number 2 is one of my favorites – An ornament card using Snow Burst and Many Merry Messages.

    DSC_4291

    Look that's me (Or at least my arm) showing one of the stampers how to cut out the ornament card using the Coluzzle Cutting System. And Here's the ornament card.

    DSC_4162 

    Pictures of the other cards from this class are coming soon – so come back and visit me again!

    Happy Stampin'
    Signature

  • I'm back today with more Christmas Class fun!

    At every Christmas Class I like to throw in a "bonus" project. It's usually a quick and simple gift packaging idea! This year I wanted to give everyone a chance to try out the new Big Shot so Lisa created this fun Cello Bag with a topper made from the Top Note Bigz Die. We filled the bag with a few cookies from our snack table (We had yummy cookies this year) This is a great gift idea for all the little gifts that you need to give – Neighbors, Co-Workers, Teachers, Friends, The List goes on and on 🙂 Anyone would love to receive a gift as pretty as this…

    DSC_4213


     For prizes at this year's class I decided to create an Ornament Tree. I made several different ornaments using some of the kits in this year's Holiday Mini along with some Rub-Ons and Glitter. There was a great assortment to choose from.

    Here's just a few of them…

    DSC_4159

    DSC_4148

    Visit my Trim The Tree Photo Album for a look at more of the ornaments from the prize tree.

    If you want to be among the first to know about my next Stampin' Event sign up for my newsletter. Just type your e-mail address into the box at the top of my blog.

    Happy Stampin'
    Signature

  • As many of you know my favorite event every year is the Christmas Card Class!! This year I held the class with one of my team members, Lisa. We held it last weekend in Kirkwood, MO (a nice central location for most of us) to celebrate World Card Making Day! It was a fabulous evening full of friends and fun! Thanks to everyone who came to this year's class and helped make it one of the best ever!!

    For those of you who could not make it – don't worry – I'll be sharing some posts this week so you can get a peek at the fun and all the great projects!

    First off a BIG BIG thank you to my very talented friend Julie Ziesemann for taking pictures for me at this event. It was so great to focus on helping out my stampers with their projects and not worry about getting enough pictures to share on the blog!

    Julie Z (Or The Other Julie as she's known in my circle) has a gift for capturing beauty & a unique prospective in every photo she takes. If you're looking for someone to capture some unique family photos for you or for your next event visit her website.

    Ok onto the subject I know you're all anxiously awaiting 🙂 The class.

    As usual this year when the stampers arrived they started the event by picking up their "Gift Bag" full of all the supplies they needed to complete the cards at the class…

    DSC_4175

    I created these bags with sheets of felt. The big white snowflakes were SO easy to attach. I ironed fusible webbing onto White Felt then die cut the Snowflake with the Big Shot. Then just iron the snowflake onto the bag. Super Easy. I sewed on one of the Snow Flurries and a Button from Stampin Up! to add a little more interest to the center of the snowflake. I finished the bag off with Jumbo Eyelets, a Ribbon Handle, and a punched tag with their names on it.

    DSC_4174

    After picking up their bags they moved down the table to pick up the instruction booklet. The booklet included instructions for every card and the gift bag, including a picture of the finished projects so they can reference them later at home whenever they want.

    DSC_4180


    The last thing for them to pick up is their name tags. This year Lisa created the name tags for the class. We usually try to come up with an idea that can be used as an ornament after the class. The idea we came up with this year was a little "present" with their name hanging on the tag. We used chipboard coasters to create the name tags and of course more SU! Snow Flurries. I Love the way these turned out. A few looks at the colorful piles of tags…

    DSC_4165

    DSC_4167 


     That's it for today! Come back tomorrow for a look at the prizes and bonus project – or better yet subscribe to the RSS Feed to receive updates every time I add a post to my blog.

    Happy Stampin'
    Signature

  • There's always one recipe from the Christmas Card Class that everyone wants, and this year it was the Chocolate-Caramel Thumbprints that my Mom and Brother made! They were flying off of the trays as fast as we could put them out! So here it is for all the bakers out there (You all know that's NOT me!) 🙂 Enjoy .. They are Super Yummy!!

    This Recipe Is From The 2004 Edition of "Better Homes and Gardens Simply Perfect Holiday Baking" it's one of MANY fabulous recipes!

    BHGCookie

    Bake at 350 for 10 minutes

    Ingredients

    1 egg
    1/2 cup butter softened
    2/3 cup sugar
    2 tablespoons milk
    1 teaspoon vanilla
    1 cup all-purpose flour
    1/2 cup unsweetened cocoa powder
    1/2 teaspoon salt
    16 vanilla caramels, unwrapped
    3 tablespoons whipping cream
    1-1/4 cups finely chopped pecans
    1/2 cup semisweet chocolate pieces
    1 teaspoon shortening

    Directions

    1. Separate egg. Cover and chill egg white until needed. Set egg yolk aside.
    2. In a large bowl, beat butter with an electric mixer on medium to high speed for 30 seconds. Add sugar and beat well. Beat in the egg yolk, milk, and vanilla.
    3. In a medium bowl, stir together the flour, cocoa powder, and salt. Add flour mixture to butter mixture; beat until well mixed. Wrap cookie dough in plastic wrap; chill about 2 hours of until easy to handle.
    4. Preheat over to 350. Lightly grease cookie sheets; set aside. In a small saucepan, combine caramels and whipping cream; heat and stir over low heat until mixture is smooth. Set aside.
    5. Beat the egg white with a fork. Place egg white in a shallow dish. Place pecans in another shallow dish. Shape dough into 1-inch balls. Roll balls in egg white; roll in nuts to coat. Place balls 1 inch apart on prepared cookie sheets. Using your thumb, make an indentation in the center of each ball.
    6. Bake about 10 minutes or until edges are firm. Spoon some of the melted caramel mixture into indentation of each cookie. (If necessary, reheat caramel mixture to keep it spoonable.) Transfer cookies to wire racks and cool.
    7. In another small saucepan, combine chocolate pieces and shortening; heat and stir over low heat until melted and smooth. Let cool slightly. Drizzle cookies with chocolate mixture. Let stand until chocolate is set. Makes about 36 cookies.

    Happy Stampin' (Or should I say Cookin')
    Signature

  • One of my Create, Ink! girls, Carrie, and her family just welcomed their new addition – Abigail Rose. Abby was born on October 2nd, healthy and hungry according to Mom! Big congrats to Carrie and the rest of her family!

    Carrie recently moved out of the area and became one of our long distance team members – we miss her!! But we decided to take advantage of her absence 🙂 … At our last team meeting I taught everyone how to make simple hair bows out of our Stampin' Up! Ribbon. (Is there anything better than dressing up baby in Stampin' Up! ?) .. I had each of them bring some of their favorite ribbon and we made up Lots of Bows. I purchased a few Baby headbands with "Add a Bow" loops on them and we put together a little welcome gift for Abby. I just sent the gift off to Carrie the other day so I can finally share with all of you 🙂 …

    Here's a look at the sample bow I made up for the meeting (A Halloween bow) I wanted to keep it simple, this was the first hair bow ever made for lots of my team members..

    Bow3

    It's attached to the White Stretchy Headband. This headband will grow and once Abby has long enough hair Carrie can just use the bows straight in her hair.

    Here's a close up look at a few of the bows we made at the meeting…

    Bow2  

    Crista Made the So Saffron Bow

    Bow1 

    and I think Amy made this Baja Breeze Bow. This one is a double bow that I also demoed for them at the meeting.

    And a quick look at the whole gift laid out together just before I boxed it up to mail off…

    BowsAll 

    I've been making the "simple bow" for a while and I don't even remember where I found directions but If you want to see how to make the double loop hair bow you can find directions by Clicking Here. Once you master the simple bows there are TONS of fabulous, fun bows you can make with your Stampin' Up! ribbon!

    Give it a try!

    Happy Stampin'
    Signature

  • At convention, Stampin' Up! was busy making all of our heads swim with fun ideas for the second phase of Decor Elements – Colors, Holidays, and More!! One of my favorite projects they demoed for us was the Spooky Spider Jar.

    Spooky_Spider_Jar


    I made one up for myself – It took me all of about 5 minutes!! A short amount of time for a Big Candy WOW!! The Stampin' Up! picture was much better than my picture… I put candy in mine with wrappers that were a little too dark for picture taking purposes – but I'll bring him along to Stamp Camp so you can all see the jar in person!! I choose a larger jar than this one so It would hold more candy! The great thing about the Stampin' Up! decor elements line is they give us size choices on the image so we can all make the project that's just right for us!

    Spooky_Spider_0908The spooky spider is only available until October 31st. You can find all the details by Clicking Here

    Don't forget you can now: Shop Online 24-7 (Click on Shop Now)

    Happy Stampin'

    Signature  

  • Hi Stampers!!

    Did you think I disappeared on you?? I'm still here and I have been stamping A LOT! but everything I'm working on right now seems to be "secret" - I've got gifts, wedding items, and of course The Christmas Class stuff. We had SO much fun at the Christmas Card Class last week, and I've got some FAB pictures coming soon to share with you!!

    The other day I finally had some time to sit down and play just for fun! One of the first projects that jumped out at me from the Stampin' Up! Idea Book this time was the cute Mini Pumpkins with the Rub-On Jack-O-Lantern faces! I had to make some for myself…

    IMG_9114


    These were so fast and easy to make – Much better than cutting and scooping out pumpkin seeds!!! 🙂 The faces come from Chills & Thrills Rub-Ons. I used black on two of the pumpkins and White on one then colored it with Summer Sun to give him a "candle inside lighting him up" look.

    Try this out for yourself! e-mail me to order the rub ons! Or
    Order Them Online 24-7 – Click here Then Choose Shop Now