I was recently invited to join my very first Design Team and I'm so excited!! Sherry over at PaperShapeZ creates the most fabulous box and card templates!! As a member of her team I get to play around with her new templates and come up with some fun ideas for them! 🙂 The first template I picked out to play with is her new Birthday Hat Favor Box.

To create this box I started with The Birthday Hat Gift Box Template.
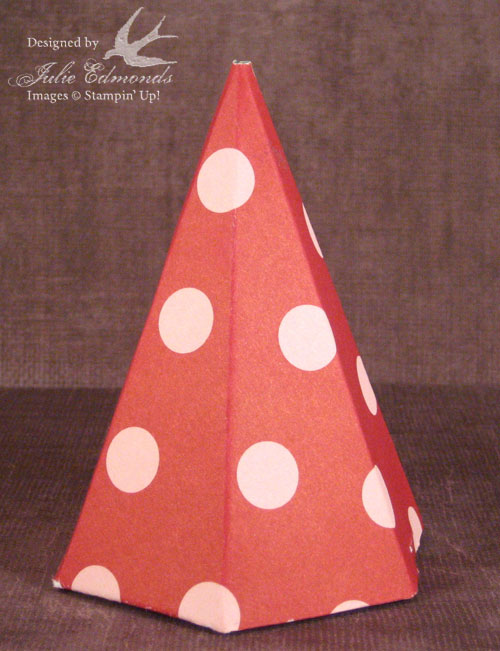
- Print out the template on Pink Pirouette card stock.
- Loosely trim the hat from the card stock leaving about a 1/2" border around the template.
- Use the Anywhere Glue Stick to cover the back side of your hat (The side with no printing). Then attach it to Pink Polka Dot Belle Rose Designer Series Paper.
- Use a bone folder to smooth the paper onto the card stock and get rid of any air bubbles. Let it try
- Cut the box out following the lines on the template and assemble using Sticky Strips to hold the box together.
Dressing The Box Up
-To create a brim for my hat I started by cutting a 3/4" strip of paper from the same piece of DSP that covers the hat. I used the paper with the opposite side out (The Pink Side) so that I had a fun contrast at the bottom of the hat.
- I used the Scallop Border Punch to scallop one edge of the strip of paper.
- Wrap the strip of paper around the bottom of the box and marked the strip where the first scallop overlapped another. Take the strip away from the hat and cut off the excess paper where you marked.
- On the inside (red side) place a small line of adhesive along the bottom edge (unscalloped edge) of the paper and also on the part that overlaps.
- Attach the paper to itself overlapping 1 scallop to create a circle.
- Carefully slide that circle onto the hat until it's all the way at the bottom. Then carefully press along the bottom edge to attach the adhesive to the hat. Your band will not touch the bottom of the hat everywhere, there may be some gaps but don't worry – it should be touching enough to hold!
– To create the ribbon pom pom at the top of the hat I followed The Directions for making a Pom Pom bow on the Better Homes and Garden website. I wrapped the loops around 3 fingers and wrapped a lot more times than they suggested.
When I was finished I cut some of the loops in the back to give it a rougher look. I had lots of fun with the pom pom bow but I think it still needs a little work. I'm going to enjoy playing and perfecting this technique in the future!!
I tied the pom pom onto a toothpick and stuck that in to the little hole at the top of the hat. To create the "Celebrate You" greeting attached to the top of the toothpick I stamped "Celebrate You" from the Party Hearty Stamp Set in Pacific Point ink. I punched it out with the Scallop Circle Punch. Then I punched 2 Round Tab Punched from Riding Hood Red card stock and overlapped them to create a circle (I'm so excited that SU had a new 1-3/4" circle Punch that's big enough to back the scallop circle and I won't have to use this trick anymore once I get my new punch)
Sandwich the toothpick between the Red Paper and the Greeting. I used sticky strips to get a good hold and that's it you're finished!!
How cute would these look an as place card holders with each child's name on the top instead of the Celebrate You???? And to all the SU demos out there you could use the 20 Year Anniversary die cut at the top for a great Hostess or Team Member gift!! 🙂
If you have any questions or would like to order any of the supplies I used to create this box e-mail me: InkyFingrz@aol.com
Happy Stampin'

Leave a reply to Julie Cancel reply