I'm back today with another fun Christmas Card from the SAS class to inspire you! This one is a fabulous Red Christmas Door with a Wreath hanging on it!!
FREE INSTUCTION SHEET: Receive a free .pdf instruction sheet with directions and measurements for creating this card when you order the Wonderous Wreath Stamp Set or Bundle. Just e-mail me after you place your online order and request the instruction sheet!
MY STAMPIN' UP! SUPPLIES LIST: If you would like to recreate this card click on the Stampin' Up! product links below for more details and easy, on-line shopping:
Holiday Helper Series Project 7: Visions of Santa Cards
The holidays are full of traditions, including stories and songs that we learned from childhood that just seem to stay with us. Maybe you remember being curled up and cozy while listening to T'was the Night Before Christmas and wondering if you'd hear Santa at your house on Christmas eve. And now you're the one reading to a captive audience of little ones on the nice list. Sometimes it's fun to put a little twist on tradition, so instead of dancing sugar plums, send some dancing Santas this year!
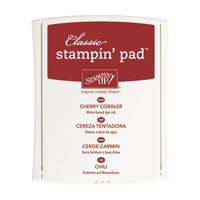
These fun little Santa's make a fun card using the Chalkboard technique. Simply stamp and emboss them in White. Stamp the sentiment in the center and emboss in White. Colour the word "Santas" using the Cherry Cobbler Dark Stampin' Blendabilities Marker.
SUPPLIES USED:
Visions of Santa Stamp Set
Santa & Co Designer Series Paper
The holidays are just around the corner and I have a special series available just for you. This is one of the 12 Holiday Helper Projects that will not only put you in the holiday mood, but help you enjoy a handcrafted holiday season. With each email mailing, you will be able to download a step-by-step tutorial that shows you exactly how to recreate this project. But you can only receive these projects by joining my special Holiday Helper mailing list, so be sure to sign up today!
I hope you're all enjoying your Turkey Day. Once you're finished with your Family Fun and Turkey Dinners today it's time to start thinking about sending out your Holiday Cards!! So to help you along with some inspiration I'll be sharing the cards from this year's Christmas Card SAS class!!
Today's card is this pretty Frosted Christmas Cheer Card – I call it frosted because the non-traditional color scheme reminds me of christmas colors with a layer of frost laying over them – everything turns pastel when it's covered with frost 🙂
This card could not be any simpler but it looks so shiny and elegant! A quick stamp in Basic Gray and then accent it with Rhinestones from the In Color Sequin pack – the sample card uses the Strawberry Slush but the card looks great with all the colors in the package!
Here's a closer look at the sparkle they add to the card
FREE INSTUCTION SHEET: Receive a free .pdf instruction sheet with directions and measurements for creating this card when you order the Christmas Cheer Stamp Set. Just e-mail me after you place your online order and request the instruction sheet!
MY STAMPIN' UP! SUPPLIES LIST: If you would like to recreate this card click on the Stampin' Up! product links below for more details and easy, on-line shopping:
Holiday Helper Series Project 6: Nordic Village Gift Bag
As a child, did you shake your presents to try to guess what was inside? Sometimes the packaging can be just as intriguing as the gift inside. Wrap your gifts up with your own style and flair with this custom Nordic Village gift bag and coordinating tag.
For centuries, the people of Mexico have gathered on Christmas Eve to light large bonfires, to pray, to sing, and to welcome the Christ Child. Luminaries have become one of the most popular ways for people to extend this custom to the present day. Welcome guests to your next gathering with hand-decorated luminaries, using the Nordic Village Designer Templates (#137089).
Watch this video on how to utilize Stampin' Up!'s artwork in the digit format with our Digital Downloads.
SUPPLIES USED:
Nordic Village Designer Templates – Digital Download
Mds Free Trial – Digital Download
The holidays are just around the corner and I have a special series available just for you. This is one of the 12 Holiday Helper Projects that will not only put you in the holiday mood, but help you enjoy a handcrafted holiday season. With each email mailing, you will be able to download a step-by-step tutorial that shows you exactly how to recreate this project. But you can only receive these projects by joining my special Holiday Helper mailing list, so be sure to sign up today!
Holiday Helper Series Project 5: From Our Home to Yours Photo Card
The holidays have a way of drawing us closer to the ones that we love; gathering us together and weaving a tapestry of memories to warm us for the year to come. When we can't actually be with family and the ones we love over the holidays, there are other ways to connect. Adorn the mantles of those that you love with a creation from the heart and then some – from your house to theirs – with this fun pull-out card.
This is a fun ornament to celebrate a new house! Or give it to your new neighbors–a special way to say "welcome" during the holidays!
SUPPLIES USED:
Holiday Home Photopolymer Stamp Set
Homemade Holiday Framelits Dies
The holidays are just around the corner and I have a special series available just for you. This is one of the 12 Holiday Helper Projects that will not only put you in the holiday mood, but help you enjoy a handcrafted holiday season. With each email mailing, you will be able to download a step-by-step tutorial that shows you exactly how to recreate this project. But you can only receive these projects by joining my special Holiday Helper mailing list, so be sure to sign up today!
Make the most of our Online Extravaganza by enjoying flash deals on select items and bundles at a 20%-50% discount! But quantities are limited, and this great opportunity only lasts from November 24 through December 2, so get yours before they're gone.
Plus, there will be limited-time door busters on November 24 and December 1 on special products-some that have never before been paired together-that are only available for 24 hours and while supplies last! These specific deals are extremely limited, so act fast!
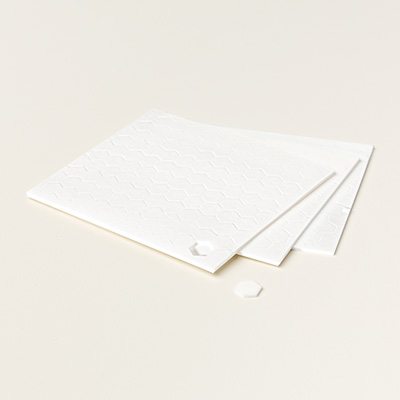
This year at the Christmas Card Stamp a Stack class we offered one bonus project. We let everyone play with the Gift Box Punch Board to create a Gift Box. I loved giving everyone a taste of how fun it can be to create fun gift wrapping for presents!!
You're going to LOVE the Gift Box Punch Board – and for ONE DAY ONLY – TODAY – Stampin' Up! has a Doorbuster Deal – 30% off the Punchboard while supplies last – so Run over to my Stampin' Store to place your order – then come back and read all about the Punch Board fun!!
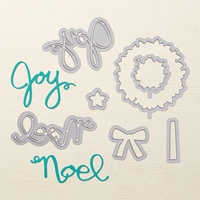
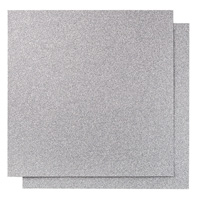
This is the box I created for the class – a very simple Crumb Cake box (There's LOTS of box sizes to choose from on the Gift Box Punch Board). To dress it up a piece of All is Calm DSP is wrapped around the box to create a Belly Band. Tie a piece of the BEAUTIFUL Silver Satin ribbon around the Belly Band. Die cut a greeting using Wonderful Wreath framelits and tie it on with a bit of Basic Gray Baker's Twine – and you've got a WOW gift in no time!!
And don't miss this great Video from Stampin' Up! featuring the Gift Box Punch Board
Don't forget the 30% off Doorbuster on the Gift Box Punch Board is good November 24, 2014 only while supplies last – so don't miss out on your chance to get this fun tool for just $13.96!!
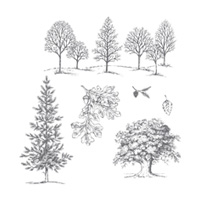
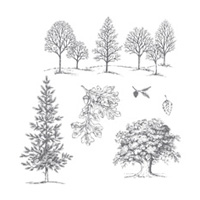
Today's card combines Lovely as a Tree with Work of Art for a pretty winter picture. An elegent Christmas Card Idea!
Stamp the Swoosh from Work of Art three times in a row without reinking to get the sky background for this card. Then stamp the Trees over the background in Basic Gray. Add a little glitter to the ground under the trees and stamp a greeting from Endless Wishes stamp set and you've got a Christmas Card everyone will love to get in the mail!!
MY STAMPIN' UP! SUPPLIES LIST: Click on the Stampin' Up! product links below for more details and easy, on-line shopping:
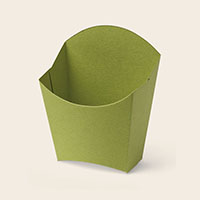
I really love the color combo in the All is Calm product lines – and I LOVED playing with it at this year's Christmas Class!! Today's project is the Fry Boxes I created for the prizes at the class, but it would be a WONDERFUL little box to create for small holiday gift giving…
Creating these cute boxes is simple!!
Die cut Fry Boxes from card stock that cordinates with All is Calm DSP
Die cut a piece of All is Calm DSP with the Fry Box Die and cut out just the back
Adhere the DSP to the back of the Fry Box while it's flat.
Assemble the Fry Box, gluing the sides with strong adhesive.
Stamp and punch out a tag. Add it to the front of the fry box.
Tuck your gift in a cello bag. Tie it shut with ribbon and gold sequence trim.
Here's a little close look at all the different colors I did…
I also applied this color combo to the Tag I put on the Grand Prize at the class
I used the Under The Tree Tag a Bag Accessory Kit and the Trendy Trims Stamp Set to create this tag. Using the Lost Lagoon and Soft Sky ink with the brown tags from the kit was a fun way to get a different look from the tag kits original Red and Green color scheme…
If you're looking for sure fun items to dress up you gifts this year too – here's my Stampin' Up! Supply List for theme projects. Click on each item for easy online shopping.